
Automatically Connect to OpenVPN on Android When on Certain WiFi Networks
Are you tired of manually connecting to your VPN every time you join a specific WiFi network? Do you wish your Android device could automatically establish a secure connection to OpenVPN without any hassle? Look no further! In this comprehensive guide, I will walk you through the process of setting up your Android device to automatically connect to OpenVPN when you join certain WiFi networks. Let’s dive in!
Understanding the Basics

Before we proceed, let’s clarify a few key terms:
- OpenVPN: An open-source VPN protocol that provides secure and encrypted connections over the internet.
- WiFi Network: A wireless local area network that allows devices to connect to the internet using radio waves.
- VPN Client: A software application that establishes a secure connection to a VPN server.
Now that we have a clear understanding of the basics, let’s move on to the setup process.
Step 1: Install OpenVPN Client
The first step is to install an OpenVPN client on your Android device. There are several OpenVPN clients available on the Google Play Store, such as OpenVPN Connect, OpenVPN for Android, and TunnelBear. Choose one that suits your needs and install it on your device.
Step 2: Configure OpenVPN Client
Once the OpenVPN client is installed, you need to configure it with your VPN credentials. This process may vary depending on the client you choose, but here’s a general outline:
- Open the OpenVPN client and sign in with your VPN account credentials.
- Select the VPN server you want to connect to from the list of available servers.
- Download the necessary configuration files for the server (usually in .ovpn format) and import them into the client.
- Save the configuration and exit the client.
Make sure you have the correct configuration files for your VPN provider. You can usually find these files on your provider’s website or by contacting their support team.
Step 3: Set Up WiFi Network Profiles
Now that your OpenVPN client is configured, it’s time to set up WiFi network profiles. This will allow your device to automatically connect to OpenVPN when you join specific WiFi networks.
- Go to your Android device’s Settings.
- Scroll down and tap on “Network & Internet” or “Wi-Fi” (depending on your device’s version and manufacturer).
- Tap on “Advanced” or “Advanced Wi-Fi” (if available).
- Look for “WiFi Network Preferences” or “WiFi Preferences” and tap on it.
- Under “WiFi Network Preferences,” tap on “Add Network” or “Add WiFi Network.”
- Enter the name of the WiFi network you want to connect to automatically.
- Under “Security,” select “WPA & WPA2 Enterprise” or “WPA2 Enterprise” (depending on your network’s security settings).
- Enter the WiFi network’s credentials (username and password) and tap “Save.”
Repeat this process for each WiFi network you want to connect to automatically with OpenVPN.
Step 4: Configure OpenVPN Client to Connect Automatically
Now that you have your WiFi network profiles set up, you need to configure your OpenVPN client to connect automatically when you join these networks.
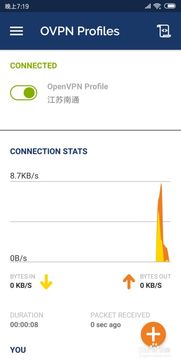
- Open the OpenVPN client on your Android device.
- Tap on the three dots in the upper-right corner to access the menu.
- Select “Settings” or “Preferences.”
- Look for a section called “Auto Connect” or “Connect on WiFi.”
- Toggle the switch to enable automatic connection.
- Select the WiFi networks you want to connect to automatically from the list.
- Exit the settings and return to the main screen of the client.
Your OpenVPN client is now configured to connect automatically when you join the specified WiFi networks.
Step 5: Test the Setup
Before you can fully rely on the automatic connection feature, it’s essential to test the setup. Here’s how to do it:
- Join


