Astrophotography with Olympus OM-1: A Comprehensive Guide
Are you an astronomy enthusiast looking to capture the wonders of the cosmos through your camera? If so, the Olympus OM-1 could be the perfect tool for you. This guide will delve into the intricacies of astrophotography with the Olympus OM-1, covering everything from camera settings to post-processing techniques.
Understanding the Olympus OM-1

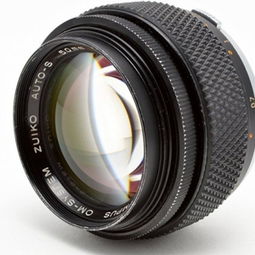
The Olympus OM-1 is a versatile camera that offers excellent performance in various lighting conditions. Its compact size and lightweight design make it an ideal choice for astrophotography, allowing you to easily carry it on your adventures. Here are some key features of the Olympus OM-1 that make it suitable for astrophotography:
| Feature | Description |
|---|---|
| 20.4MP Sensor | High-resolution sensor for capturing detailed images of celestial objects. |
| 5-Axis Image Stabilization | Reduces camera shake, which is crucial for long exposure photography. |
| 4K Video Capabilities | Record stunning 4K video of the night sky. |
| In-body Image Stabilization | Further reduces camera shake, enhancing the quality of your astrophotography images. |
With these features, the Olympus OM-1 is well-equipped to handle the challenges of astrophotography, such as low light conditions and long exposure times.
Camera Settings for Astrophotography
Setting up your Olympus OM-1 for astrophotography involves adjusting various camera settings to ensure the best possible results. Here’s a breakdown of the essential settings you’ll need to consider:
- Aperture: A wide aperture (low f-number) allows more light to enter the camera, which is crucial for capturing faint celestial objects. Aim for an aperture of f/2.8 or wider.
- ISO: The ISO setting determines the camera’s sensitivity to light. For astrophotography, you’ll want to use a high ISO value, such as ISO 3200 or 6400, to capture the faint light from stars and galaxies.
- Shutter Speed: The shutter speed determines how long the camera’s shutter remains open, allowing light to enter the sensor. For deep-sky objects, such as galaxies and nebulae, use exposure times of 30 seconds or longer. For stars, use exposure times of 5 to 10 seconds to avoid trailing.
- Focus: Autofocus can struggle in low light conditions, so it’s best to switch to manual focus. Use live view and zoom in on a bright star to fine-tune the focus.
Remember to experiment with different settings to find the combination that works best for your specific astrophotography subject.
Mounting Your Camera for Astrophotography

Using a stable mount is essential for astrophotography, as it helps to minimize camera shake and allows for longer exposure times. Here are some popular options for mounting your Olympus OM-1 for astrophotography:
- Equatorial Mount: An equatorial mount aligns the camera with the Earth’s rotation, allowing for longer exposure times without star trailing. This is the ideal choice for deep-sky astrophotography.
- Alt-Azimuth Mount: An alt-azimuth mount is simpler to use than an equatorial mount and is suitable for shorter exposure times and wide-field imaging.
- Tripod Mount: For shorter exposure times and simpler setups, a tripod mount can be used. However, it’s important to ensure the tripod is stable and capable of supporting the weight of your camera and lens.
When using a mount, make sure it is properly aligned with the celestial objects you wish to photograph. This will help to ensure that your images are sharp and free of star trailing.
Post-Processing Your Astrophotography Images
Post-processing is an essential step in the astrophotography workflow, as it helps to enhance the quality and clarity